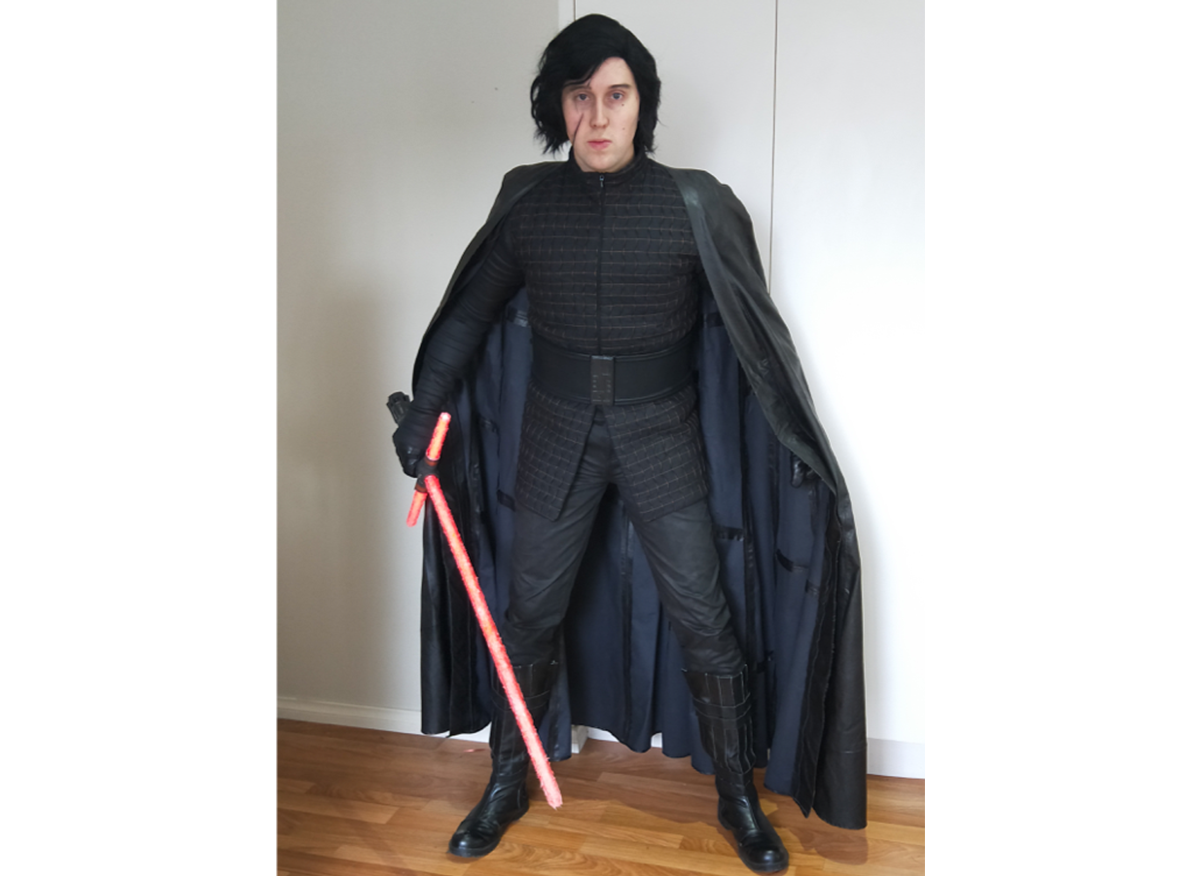
After watching Star Wars the Last Jedi and seeing Kylo Ren’s new and improved costume I knew I wanted to make it.
At a quick glance its all just basic black pieces but when you get up close and really into it there is so much texture and detail worked into it all.

To start things off was the fun task of the main tunic.
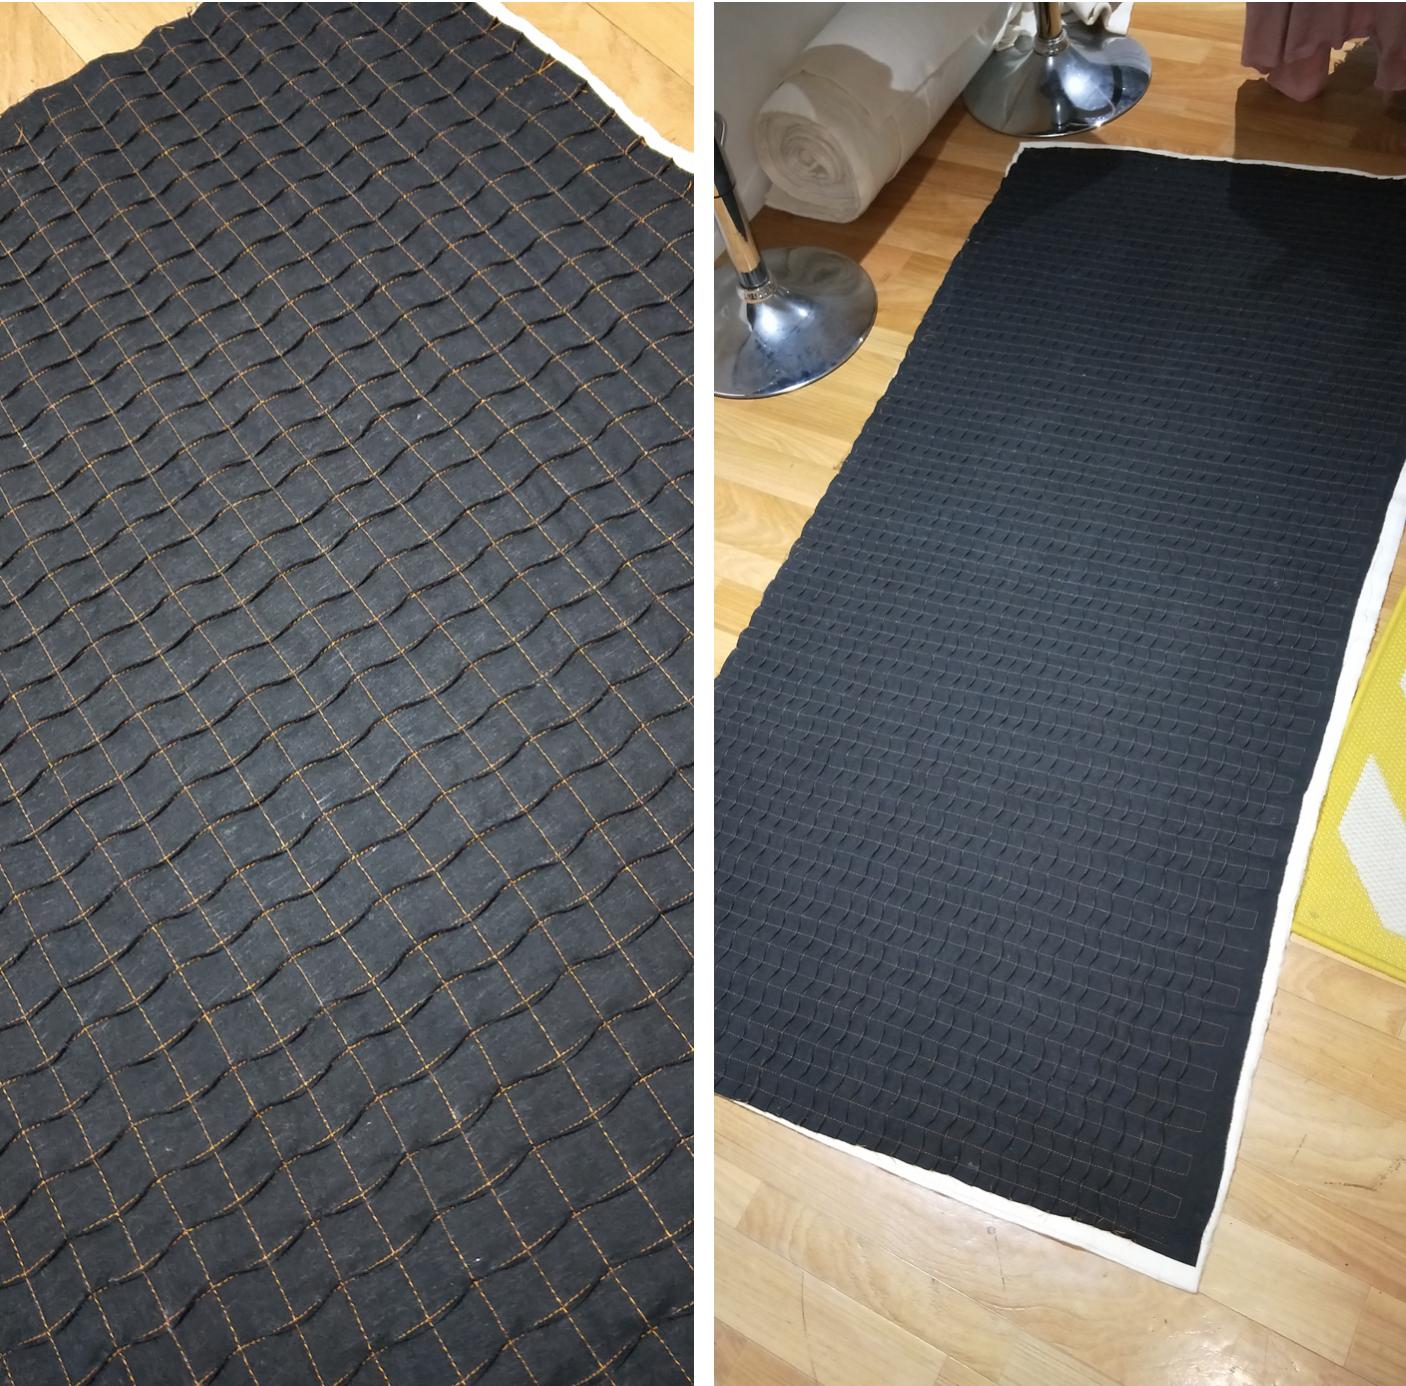
With a bit of research, the main fabric is a lightweight black woven with copper/gold stitch details. To keep my costumes on a budget I used a simple Black Calico which had the right weight to it and visible weave. Starting in one direction I began 3mm pintucks every 20mm

To make life in some ways easier and also more difficult on myself, I used a 180 wide calico to allow for the size that would be lost in the pintucking.

After finally working all the way across the fabric, the next part of the details was quilting back and forward over the pintucks to give the wave effect. Considering I like working really quickly I simply used a quilting basting spray to secure the pintucked fabric over some cotton wadding to save myself time pinning things in place. The same 20mm measurement was used again between each row of stitching.
To take a break from staring at that fabric after 3 nights solidly working on it, I moved onto the undershirt. Kylo Ren’s pleated sleeves are a recognisable part of his costume featured in both The Force Awakens and The Last Jedi. Many costumers have used Cotton Duck for the pleated fabric of the sleeves that also have a zipper that runs all the way from the armpit to the wrist in order to have the super fitted sizing. The only downfall I had heard is that because of the duck there’s very limited movement and leaves a whole heap of red marks up the arms. I found a similar texture in a coated stretch denim. Comfort is always an added bonus to cosplay so I’ll take it anytime I can.
I didn’t really have any set ideas on how to go about doing the pleats so I just pinned the whole bit of fabric into my carpet and then measured out each pleat with a large metal ruler and worked my way up until there was enough for a sleeve length.
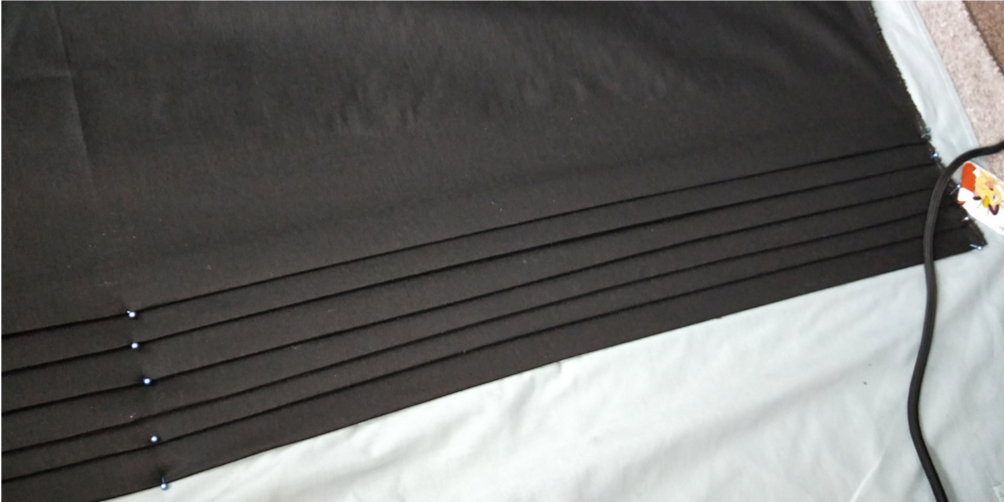
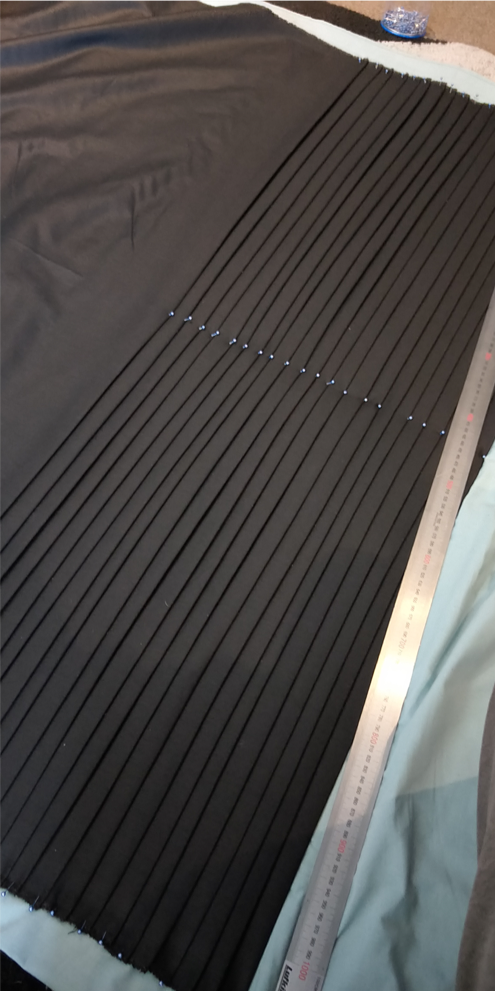
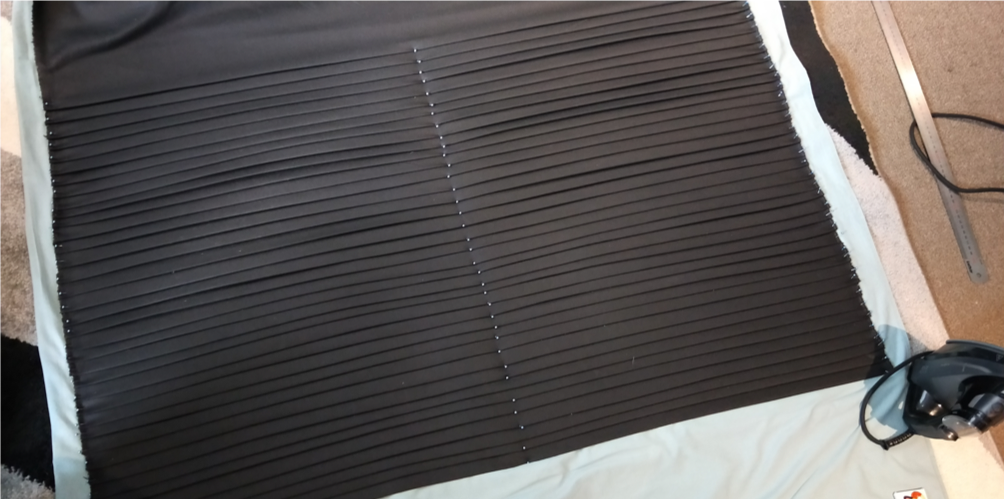
Making sure to press the pleats flat as I went was essential. To keep the pleats in place it needed a backing fabric. I used wide masking tape along the top of the pleats to hold it all in place and then with a light mist of spray adhesive I applied black interlock to the back of the pleated denim.
Once this was in place I sewed each pleat in place with a straight stitch underneath each fold.I could then cut out the raglan style sleeves. Purely for comfort (this was going to be a very warm costume to wear) the base of the undershirt was a simple black Lycra.


Now we’re back onto the tunic! Needed to be pretty form fitting so I drafted up a quick pattern using my bodysuit pattern for the bodice and then a simple skirt piece added to the waist.
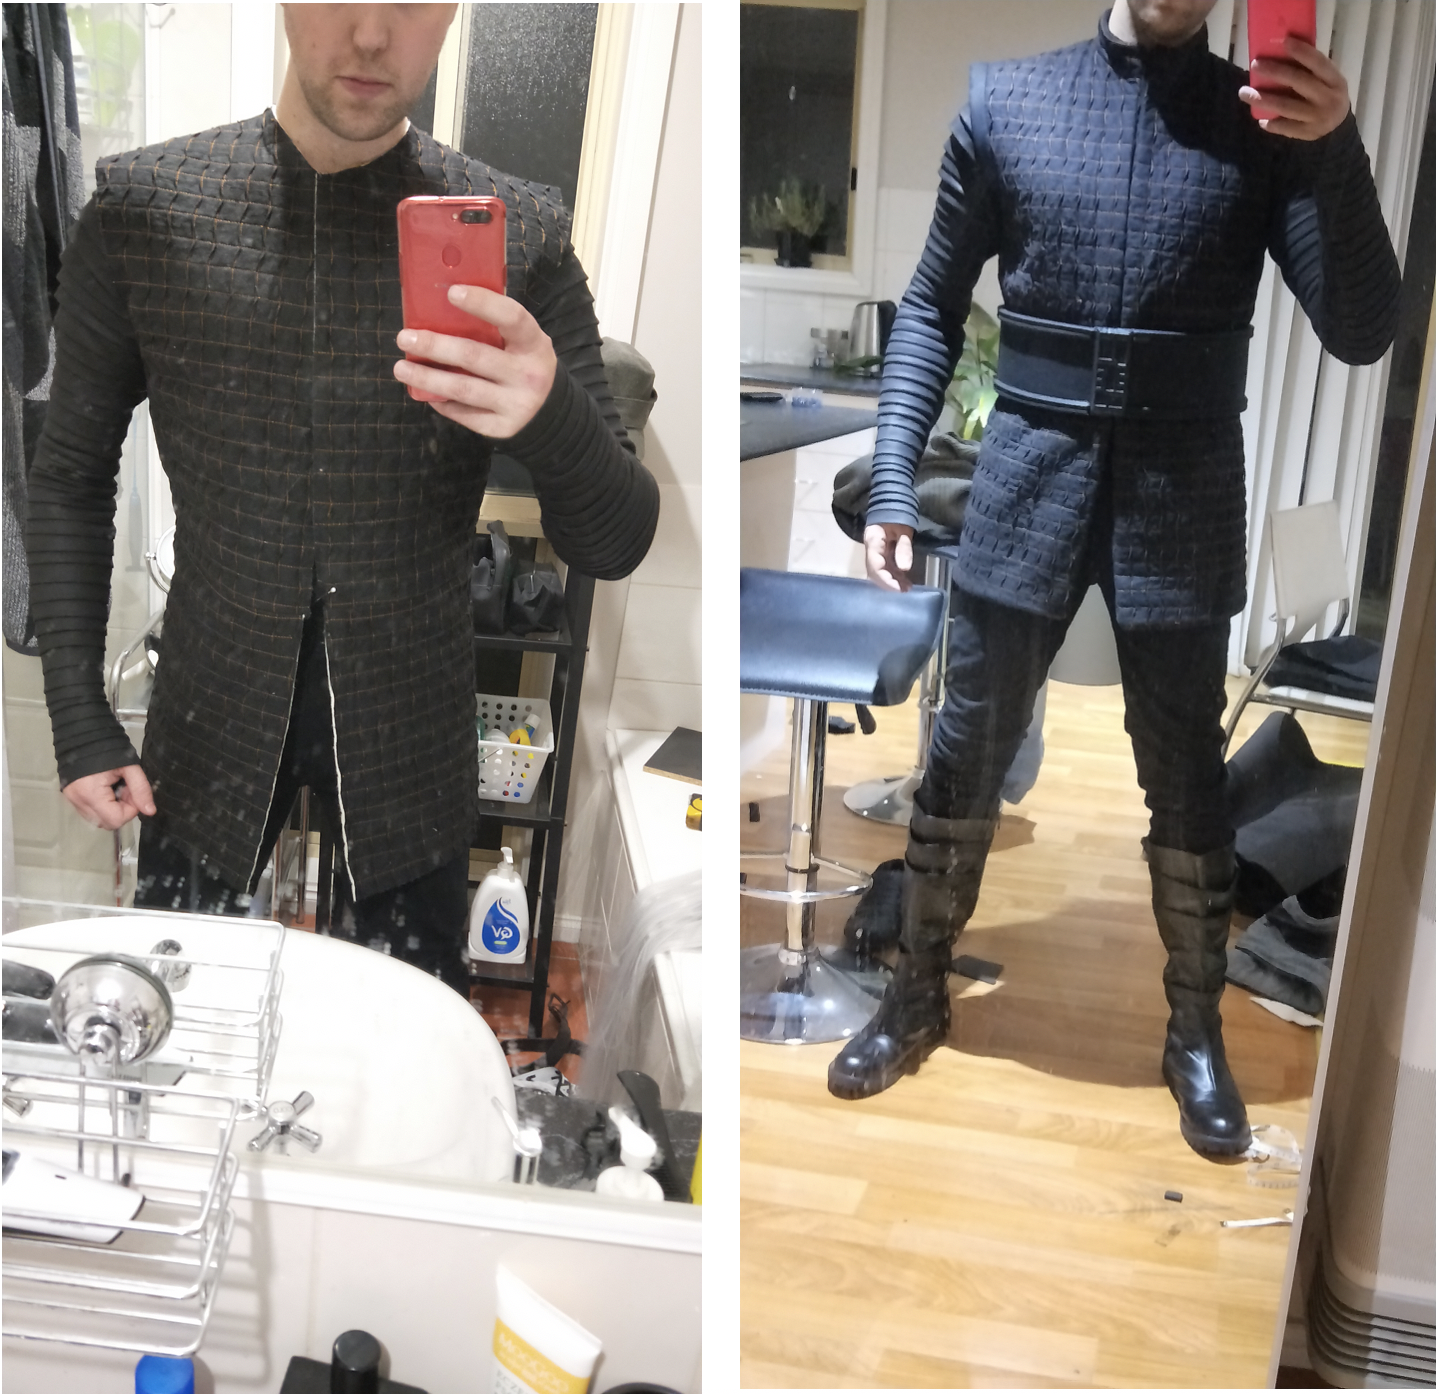
Throw in a cotton voile lining, invisible zipper in the front and some cotton/linen furnishing weight fabric on the sleeve holes as binding to finish it all off!
The last part I needed was the most fun, I love sewing with vinyls/pleathers and anyone who ever met me knows I love a good cape! The goal was to bash out the whole thing in a single night.
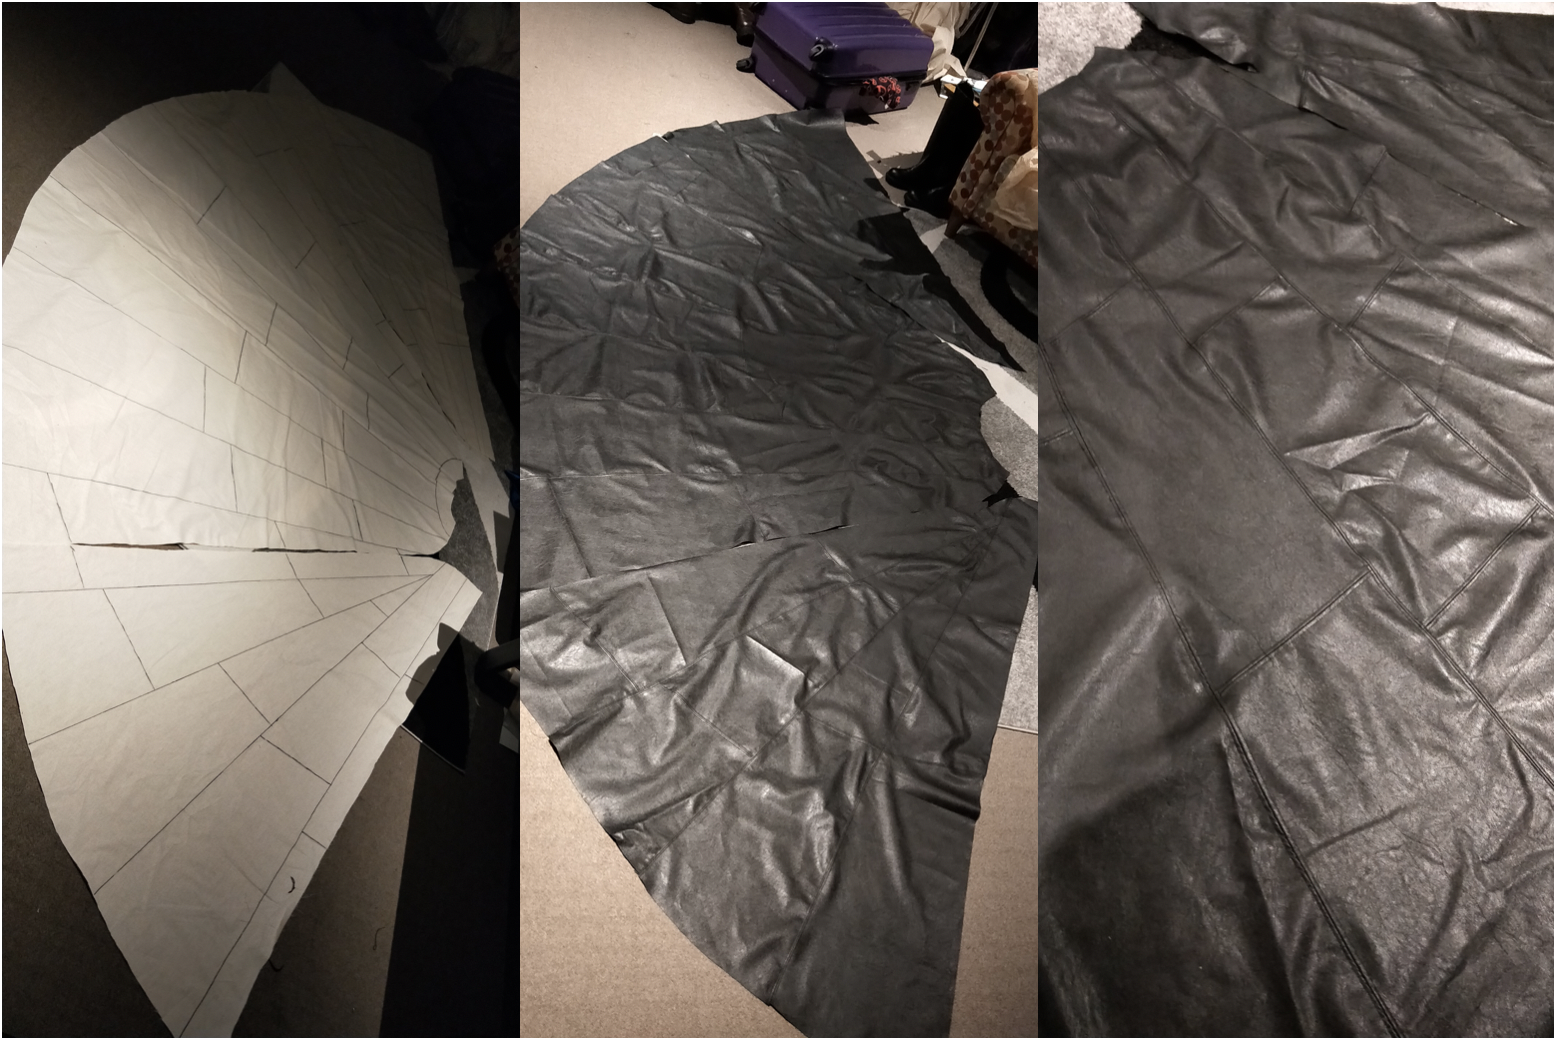
Quickly made a mockup and drew out the panel lines. Worked out to be 42 individual panels in total. I then cut them all out and transferred onto my pleather adding an extra 15mm for seam allowances. The extra seam allowance is to both help pleather sewn seams sit better and to add the extra detail needed on the cape. Each seam was stitched with a regular straight stitch, then folding back each side of the seam and then using a stitch with a slightly longer length to top-stitch down each side. This helps the seam lay flat as pressing pleather doesn’t always work out perfectly.
Tada! One fully completed Supreme Leader of the First Order!
Total time spent was just under 5 days in total and very little sleep involved! Totally worth it, was definitely a great chance to work on some precision sewing!


