

In mid-2018 J, who I work with and was a few weeks away from going on Parental Leave, approached me shyly in the photocopier room. Her sister had given her their old Baby Björn Soft Balance Bouncer frame but had lost the cover and was wondering if I could sew up a new one for her.
The pattern we ended up using is by Twee emmerkes water, you’ll find it here.

This pattern is free but the author checked with Baby Björn that it would be ok for her to share it on her sewing blog.
It’s hand-drawn but is well laid out, has all the notches marked and includes a test square so you can check your printer scale. There is also a layout plan of how the sheets go together on the last page. It could use a few numbered notches to help you work out which piece attaches to which but it’s not that tricky to work out. I’ve paid money for much worse.You can read all about this first bouncer cover over on my blog, including fixing one small error and some extra tips. Today we’re here to see the second iteration, for meeee!
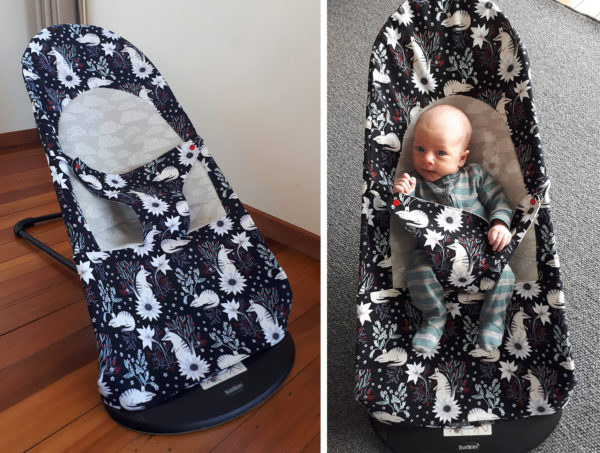
The first cover for J turned out perfectly so I kept the pattern and when a cheap Baby Björn Soft Balance Bouncer came up on TradeMe recently I grabbed it knowing I could make a new and much more interesting cover for it.
This is the first time I’d actually seen both the cover and frame for one of these in real life. The belt attachments are more like toggles and there are also little “T” anchors on the frame to keep the cover on, it attaches with little loops of elastic.
I started with the belt and this time I used buttons. For J’s bouncer cover, I used hammer-on snaps because I was worried about buttons being ripped off and becoming a choking hazard however J’s feedback was that once baby got a bit stronger and heavier she was able to pop the snaps open quite easily. 
I did briefly consider removing the toggles and their receivers from the original cover but I decided that in the future it would be better to keep the original cover intact because these bouncers are really popular and I’ll be able to sell it once we’re done with it. Baby stuff costs a lot of money!


I have no baby yet for a proper demonstration so here is a cute bunny instead:


It didn’t take long at all and I might even make a second one for when this version inevitably ends up in the wash!
Happy sewing!