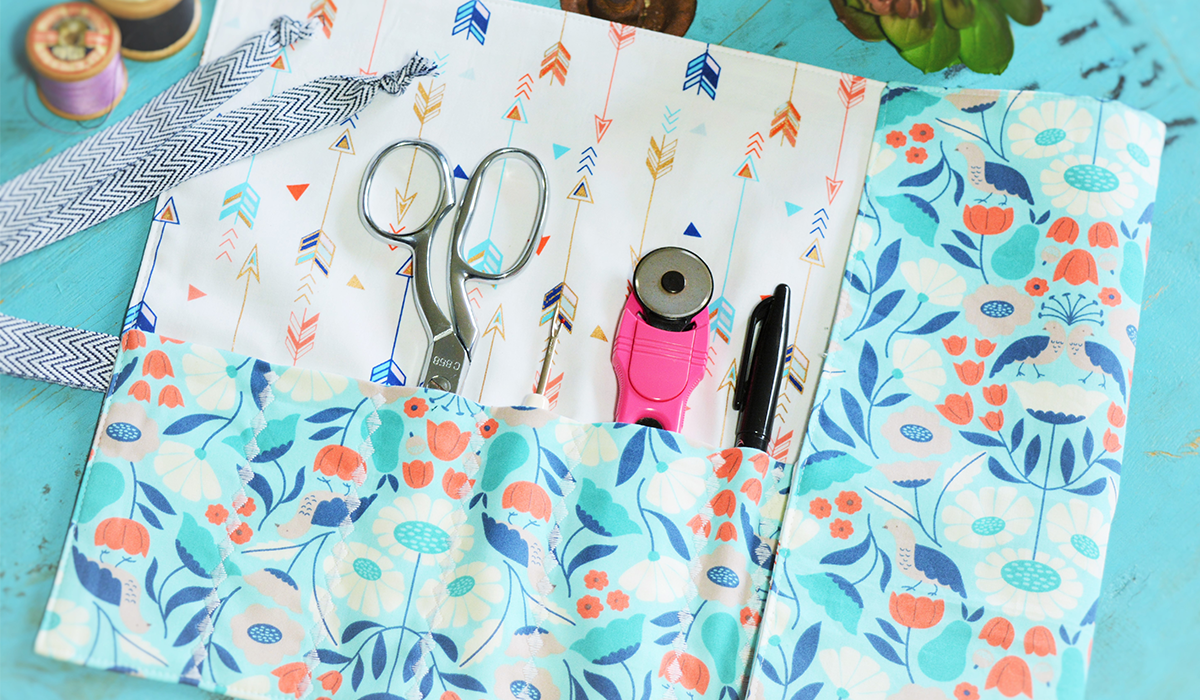
This roll up accessories case is very versatile! It can be made to be used with sewing accessories, make-up brushes, tools, pencils, knitting needles and the list can go on! This project was sewn using the Singer Stylist 9100. This machine has a large variety if decorative stitches to spruce up any project such as this accessories case.
Materials Needed:
- 1/2 metre cotton fabric (outer fabric)
- 1/2 metre cotton fabric (lining)
- 1/2 metre fusible interfacing
- 1 metre ribbon
- All purpose thread to match fabric
- Machine embroidery thread (contrasting colour)
- Ruler, mat and rotary cutter or scissors
- Point turner, letter opener or chopstick
- Straight Pins
- Water soluble marking pen or chalk
Preparation:
- Using the ruler, rotary cutter and the mat, cut a 17″ x 20″ rectangle from the outer fabric, lining and interfacing.
- Fuse the interfacing to the wrong side of the outer fabric, following the manufacturer’s instructions.
Sewing Instructions:
- Thread the sewing machine with the all-purpose thread top and bobbin.
- Using the water soluble marker, mark a line on the left edge of the outer fabric piece, about 9″ up from the bottom.

- Fold the ribbon in half, and pin the folded edge of the ribbon to the outer fabric at the mark, having the fold of the ribbon even with a raw edge of the fabric.
- Stitch the ribbon in place using a 1/2″ seam.
- With right sides together and raw edges even, pin the outer fabric to the lining.
- Sew the lining and the outer fabric together using a 1/2″ seam and leaving a 5″ opening for turning.

- To eliminate bulk, trim away excess fabric at the corners.
- Turn the fabric to the right side out through the opening. Use the point turner to carefully push out the fabric at the corners.
- Press the fabric, enclosing the seams at the opening.
- Topstitch closely along the bottom edge.
- To form the pocket, fold up the 5″ from the lower edge. Press and pin the sides in place.

- To close pocket edges, begin stitching, starting at the lower left corner. Continue to sew up the side, across the top and down the right side to the lower right corner, keeping the stitching close to the edge of the fabric.
- It’s now time to determine what you would like to use your “roll up organiser” for and create the desired individual pocket sizes. Use the water soluble marker and ruler to mark stitching lines.

- Thread the machine with the embroider thread in the top and and bobbin. Snap on the satin stitch foot. Select a decorative stitch. The diamond stitch was used in this example. Begin stitching at the bottom edge and stitch along the lines to the upper edge of the pocket, reinforcing the beginning and ending of the seam by taking a few reverse stitches. Trim away excess threads. Spritz with water to remove any of the remaining markings. Press.
- Fill the organiser with the things you want to organise. To help prevent items from falling out, the top edge may be folded down and stitched in place along the sides. Roll and tie ribbon around the organiser.
Happy Sewing.

